Projector Central Calculator
Calculate the ideal central position for your projector by entering your screen dimensions and projector specifications below.
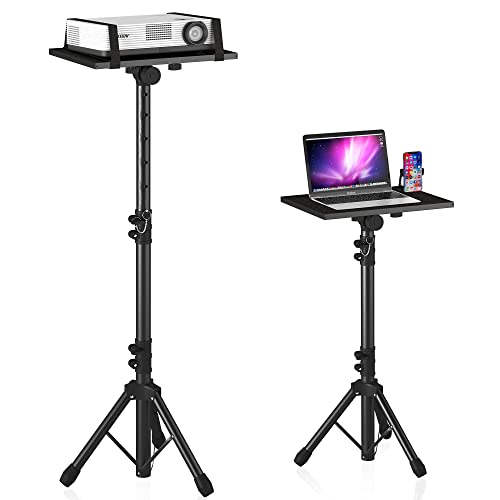
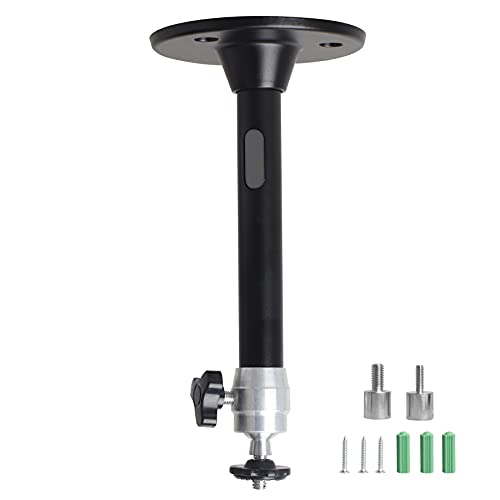
List of the Top 10 Best Projector Accessories:


Complete Guide to Projector Central Positioning
Proper central alignment is essential for achieving the best possible image quality from your projector. This comprehensive guide covers everything you need to know about finding and maintaining the ideal central position for your projector.
What is Projector Central Alignment?
Central alignment refers to the optimal positioning of your projector relative to the screen center point. Proper alignment ensures:
- Minimal image distortion
- Uniform focus across the entire screen
- Reduced need for digital correction
- Maximum brightness consistency
- Proper aspect ratio maintenance
Understanding Lens Offset
The lens offset is a critical specification that determines how much your projector can be positioned above or below the screen center while maintaining proper image alignment. It's typically expressed as a percentage of the screen height.
Vertical Offset = Screen Height × (Lens Offset Percentage ÷ 100)
Types of Projector Alignment
| Type | Offset Range | Typical Position | Best Use Cases | Advantages | Considerations |
|---|---|---|---|---|---|
| Ceiling Mount | +50% to +100% | Above screen center | Home theaters, conference rooms | Out of the way, professional look | Requires proper mounting hardware |
| Table Mount | -30% to -100% | Below screen center | Portable setups, temporary installations | Easy to adjust, no mounting required | Can be in the way, potential for bumps |
| Rear Projection | ±30% | Behind screen | Permanent installations, bright rooms | No shadows, clean look | Requires special screen, more space |
| Ultra Short Throw | ±5% | Very close to screen bottom | Small rooms, interactive displays | Minimal shadows, space saving | Limited positioning flexibility |
Factors Affecting Central Alignment
1. Lens Shift Capability
Projectors with lens shift allow for more flexible placement while maintaining image quality. The shift range is typically expressed in percentage of screen size.
Lens Shift Examples:
- Vertical Shift: Allows adjustment above/below screen center
- Horizontal Shift: Enables left/right movement from center
- Combined Shift: Some projectors offer both vertical and horizontal
2. Keystone Correction
Digital keystone correction can compensate for misalignment but should be used sparingly as it:
- Reduces effective resolution
- Can introduce artifacts
- May affect brightness uniformity
- Should be minimized for best quality
3. Room Constraints
Physical space limitations can impact central alignment. Consider these factors:
Ceiling Obstructions
- Light fixtures
- Ventilation ducts
- Structural beams
- Smoke detectors
Furniture Placement
- Seating arrangements
- Tables and stands
- Traffic patterns
- Speaker locations
Screen Placement
- Wall-mounted vs. free-standing
- Screen height from floor
- Tilt angle if any
- Border size and frame
Installation Best Practices
Mounting Considerations
Precision Alignment
Steps for perfect central alignment:
- Use a laser level for reference lines
- Measure twice before drilling
- Account for screen border thickness
- Verify with test pattern before finalizing
- Mark center points clearly
Temporary Setup
For testing before permanent installation:
- Use adjustable tripod or temporary mount
- Test different positions
- Check sight lines from seating
- Evaluate at different times of day
- Consider all usage scenarios
Common Alignment Challenges
1. Off-Center Projection
Solutions for common off-center issues:
- Horizontal Misalignment: Use horizontal lens shift or adjust mount position
- Vertical Misalignment: Adjust vertical lens shift or offset
- Angled Projection: Ensure projector is perfectly perpendicular to screen
- Uneven Edges: Check screen flatness and projector leveling
2. Environmental Factors
Consider these environmental impacts on central alignment:
- Room Symmetry: Asymmetrical rooms may require compensation
- Viewing Angles: Account for primary seating positions
- Light Sources: Position to avoid light shining on lens
- Heat Vents: Avoid placing in direct airflow
Advanced Central Alignment
Professional Alignment Tips
Alignment Tools:
- Laser measuring tools for precision
- Digital angle finders for perfect leveling
- Test patterns for fine-tuning
- Grid overlays for visual reference
- Remote monitoring for final adjustments
Screen Characteristics
Screen features that affect central alignment:
- Fixed Frame Screens: Most stable reference point
- Motorized Screens: Account for slight movement
- Acoustically Transparent: May affect perceived center
- Curved Screens: Require specialized alignment
Troubleshooting Guide
Uneven Focus
- Check perpendicular alignment
- Verify lens to screen distance
- Clean lens surface
- Adjust focus settings
Image Cropping
- Verify aspect ratio settings
- Check zoom position
- Adjust lens shift
- Confirm native resolution
Color Variance
- Check for even illumination
- Verify lamp hours
- Inspect color wheel (if applicable)
- Reset color settings
Future Considerations
When planning your central alignment, consider these future aspects:
- Upgrade Path: Allow for different lens offsets
- Technology Changes: New projectors may have different requirements
- Room Modifications: Potential changes to screen position
- Usage Evolution: Different content may require adjustments
Frequently Asked Questions About Projector Central Alignment
Basic Concepts
Why is central alignment so important for projectors?
Proper central alignment ensures:
- Uniform focus across the entire image
- Consistent brightness from edge to edge
- Minimal geometric distortion
- Reduced need for digital correction
- Optimal use of projector's resolution
How do I find my projector's lens offset specification?
You can find the lens offset through:
- The projector's manual or spec sheet
- Manufacturer's website under technical specs
- Online projector databases
- By measuring your current setup if properly aligned
What's the difference between lens shift and keystone correction?
Key differences include:
- Lens Shift: Optical adjustment, no quality loss
- Keystone: Digital correction, reduces quality
- Lens Shift: Limited by hardware design
- Keystone: More flexible but degrades image
Installation and Setup
How precise does my central alignment need to be?
Precision requirements depend on:
- Projector resolution (higher res needs more precision)
- Screen size (larger screens show errors more)
- Lens quality (better lenses may be more forgiving)
- Viewing distance (closer seating shows imperfections)
Can I compensate for imperfect alignment with settings?
While possible, it's not ideal because:
- Digital correction reduces resolution
- May introduce artifacts or lag
- Can affect brightness uniformity
- Makes calibration more complicated
Should I align to the screen's physical center or image center?
Consider these factors:
- Most setups use image content center
- Account for any overscan or underscan
- Some screens have non-active borders
- Test patterns help verify proper alignment
Performance and Quality
Does central alignment affect image brightness?
Yes, proper alignment affects brightness by:
- Ensuring even light distribution
- Maximizing lens efficiency
- Reducing light spill outside screen
- Minimizing brightness falloff in corners
How does alignment impact focus uniformity?
Alignment affects focus in these ways:
- Perfect alignment gives uniform focus
- Misalignment causes focus differences
- Corners show focus issues first
- May exceed lens's depth of field
Will better alignment reduce visible pixel structure?
Proper alignment can help by:
- Ensuring optimal viewing angles
- Reducing optical distortions
- Allowing proper focus across image
- Minimizing digital processing
Troubleshooting and Optimization
What should I do if my projector doesn't have enough lens shift?
Consider these alternatives:
- Adjust screen position if possible
- Use a different mounting location
- Consider a projector with greater shift
- Use optical shift accessories
How do I optimize alignment for my specific setup?
Follow these optimization steps:
- Use test patterns for verification
- Adjust in small increments
- Check from multiple seating positions
- Verify with different content types
How often should I verify my alignment?
Regular checks should include:
- After initial installation
- Following any room changes
- If projector is moved or bumped
- As part of routine maintenance
Special Situations
How does central alignment work with curved screens?
Curved screens require:
- Specialized alignment techniques
- Account for screen curvature
- Possible edge blending
- Different throw distance calculations
What about alignment for 3D projection?
3D adds these considerations:
- More critical alignment for depth perception
- Potential need for brighter projection
- May require specific screen types
- Additional calibration steps
Can I use mirrors to help with central alignment?
Mirror systems can help but require:
- High-quality first-surface mirrors
- Precise angle calculations
- Additional light path length
- Potential image flip adjustments
Future Planning
How should I plan mounts for future alignment needs?
Consider these future-proofing steps:
- Use adjustable mounting systems
- Leave room for different positions
- Plan for potential screen changes
- Account for technology evolution
Will laser projectors change alignment requirements?
Laser projectors may affect:
- Long-term stability (less drift)
- Heat management positioning
- Potential for different lens designs
- Longer maintenance intervals